
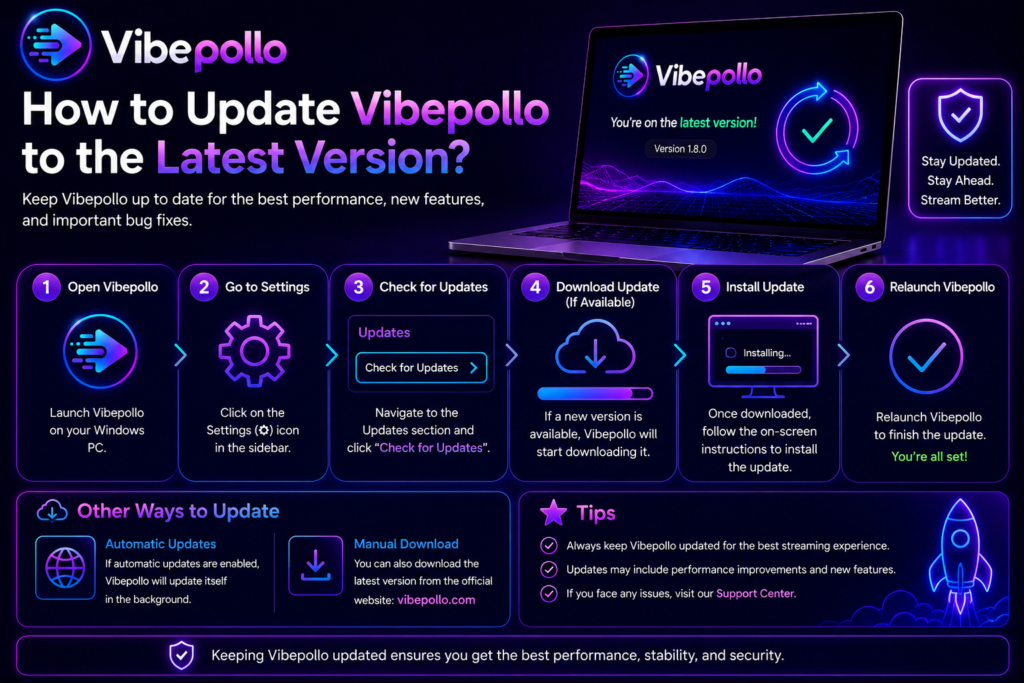
Updating Vibepollo is simple, and it is worth doing regularly, because this is a fast-moving project: the upstream GitHub project publishes new releases almost daily, while an old host version can break overnight when Windows or your GPU driver updates. The rule is easy — check for a new release on the homepage or GitHub, install the new version over the old one, and keep your pairing and settings intact.
In this guide, you will learn exactly how to check your current version, update on Windows and on the Linux beta, test that the stream still works, and what to do if an update breaks your stream, so you never have to guess whether you are running the latest version.
Read more: What Are the System Requirements for Vibepollo?
Why Updates Matter More Here Than on Most Apps
Most apps can sit un-updated for months and still work. A game-streaming host cannot, for three reasons.
First, Vibepollo depends on Windows, your GPU driver, and Moonlight all agreeing with each other. When any one of them changes — a Windows update, a new NVIDIA or AMD driver, a new Moonlight release — an old host version can develop a black screen, an encoder error, or a stream that worked last week and fails today.
Second, the project itself moves fast. New releases fix bugs, improve encoding, and add support for new setups. Running a version from weeks ago means missing those fixes while still hitting the bugs they fixed.
Third, the site’s own download files can fall behind the project. The homepage files were uploaded on 11 October, while the upstream project has kept releasing since. That is why this guide tells you to check the project releases as well as the homepage, not just re-download the same file and assume it is new.
None of this means you must update every single day. It means you should check regularly — for example once a week, or whenever a stream starts misbehaving after a Windows or driver update — and update when a newer release is available.
Before You Update: Two Minutes That Prevent Most Problems
Do these before you touch the installer:
- Stop any active stream. Close Moonlight on the client and end the session. Never update the host in the middle of a stream.
- Note your current version and your working settings. Write down the version you are running, your resolution and frame rate (for example 1080p at 60 FPS), and any display or encoder choice you changed from the default. If the update changes a setting, you will know what to put back.
- Make sure your PC will not sleep or restart mid-install. A Windows update restarting the PC during a host install is a classic cause of a half-installed driver.
- Keep your Moonlight pairing in mind, not in fear. Updating the host over the old install is meant to keep your pairing and settings intact. You should not need to re-pair from scratch — but keep your client nearby, because if anything does go wrong, re-pairing with a fresh PIN is the first recovery step, not the last resort.
Step 1: Check Which Version You Are Running
You cannot know whether an update is needed until you know what you have.
- On Windows: open the Vibepollo web interface on the host PC (the same interface you used at first setup) and look for the version shown there. Compare it with the latest release listed on the homepage or the official GitHub releases page.
- On the Linux beta: check the installed package version with your package manager before you update, so you can tell whether the update actually moved you forward afterwards.
- If the numbers match the latest release, stop here. There is nothing to update, and reinstalling the same version will not fix a streaming problem — that problem lies elsewhere, such as the network, the encoder, or a driver.
A common mistake is re-downloading the homepage file without checking its version. The file name does not tell you the version. Always compare version numbers, not file names.
Step 2: Get the New Version From a Trusted Source
Only two sources count as trusted here:
- The Vibepollo homepage — the Windows package there is presented as Vibepollo.zip, around 32 MB, containing the Vibepollo.msi installer inside it.
- The official GitHub releases page for the project.
Do not update from a mirror, a re-upload, or a “free download” site, even if it claims a newer version. A fake or repackaged host is the single worst thing you can install on a PC that captures your screen and accepts controller input. If a site asks you to pay for Vibepollo, it is not the real thing — Vibepollo is free and open source.
One more warning from the download guide, because it still applies to updates: Vibepollo-master.zip (around 42.9 MB) is source code, not an installer. If you download that file by mistake, you will not get an updated host — you will get a source archive. The file you want is the Windows package with the .msi installer inside it.
Step 3: Update on Windows
These are the exact steps:
- Close Moonlight and any running stream, as above.
- Download the new Windows package from the homepage or GitHub releases.
- Run the Vibepollo.msi installer from inside the new package, over the existing install. Do not uninstall first unless a step below tells you to. Installing over the old version is how your pairing and settings are kept.
- Allow the prompts you expect: if Windows SmartScreen appears, it is the same warning you saw at first install for an unsigned open-source installer — check the file came from a trusted source, then proceed. If the firewall asks, allow Vibepollo, or Moonlight will not be able to see the host afterwards.
- Let the installer finish, then restart if it asks. Skipping a requested restart is a common cause of the virtual display driver not loading after an update.
- Open the Vibepollo web interface and confirm the version number changed to the new release. If the version number did not change, the update did not take — do not assume it worked.
That is the whole Windows update. There is no separate updater to hunt for, and no settings export to perform first, because the install-over method is the update method.
Step 4: Update on the Linux Beta
The Linux beta updates differently, because it is a package, not an .msi:
- Arch Linux and CachyOS only. Updates come through the signed pacman repository, with a DKMS display driver — the same route the beta was installed from. There is no Ubuntu, Mint, Debian, Fedora, AppImage, Flatpak, or Docker update path in this beta.
- Update the package with pacman, then reboot if the display driver or kernel changed. Skipping the reboot after a DKMS driver update is the Linux equivalent of skipping the Windows restart above: the new driver will not be loaded.
- Check the version after rebooting, in the web interface or with your package manager, the same way as on Windows.
- If you are on an unsupported distribution, do not try to force the beta update onto it. Use the Windows host, which is the stable path while Linux support widens.
Pre-login streaming on the Linux beta is NVIDIA-only, and SteamOS remains a separate experimental bundle — an update does not change either limit, so do not expect those to appear just because the version number went up.
Step 5: Test the Stream Before You Call It Done
An update is not finished when the installer closes. It is finished when a stream works.
- Open Moonlight on your usual client and check that your host appears. If it does not, check the firewall prompt first, then pairing.
- Pair again only if needed. If the host appears and your old pairing still works, do not re-pair for the sake of it. If pairing was lost, generate a fresh PIN in the host web interface and pair again — the same steps as first setup.
- Start at 1080p at 60 FPS, even if you normally stream higher. Get a smooth stream first, then go back to your usual resolution and frame rate.
- Play for a few minutes, not a few seconds. Encoder and display problems often show up after the first minute, not in the first frame.
- Check your display choice. If the stream looks wrong — wrong resolution, wrong monitor, black screen — check the display setting in the host web interface before you blame the update.
If all five pass, you are done. If any one fails, work through the next section in order instead of reinstalling blindly.
If an Update Breaks Your Stream
Work in this order. Each step fixes a different cause, and skipping ahead wastes the fix that would have worked:
- Restart the host PC. A surprising number of post-update problems are a driver that has not loaded yet.
- Update your GPU driver and Windows. An old driver with a new host — or a new driver with an old host — is the most common mismatch of all.
- Check the firewall and the display setting. A blocked firewall prompt hides the host from Moonlight entirely; a wrong display choice gives you a black or stretched stream.
- Re-pair Moonlight with a fresh PIN. If pairing was lost or corrupted by the update, a clean pairing fixes it in minutes.
- Reinstall the same new version over the top once more. Only now, after the steps above, does a second install make sense — it repairs a half-finished first install.
- Roll back only as a last step. If the new version genuinely breaks your setup and the steps above do not help, reinstall the previous version you noted before updating, and wait for the next release. Report the problem on the project’s GitHub if you can, with your version numbers and GPU, so the next release can fix it.
What not to do: do not install two hosts at once, do not mix a Windows package with a Linux install, and do not download a “fixed” copy from a mirror site. Every one of those turns a small update problem into a bigger one.
How Often Should You Update?
A practical rhythm, not a daily chore:
- Check weekly, or whenever a stream breaks after a Windows or driver update.
- Update when a newer release is available and you have ten quiet minutes — not in the middle of a gaming session, and not right before guests arrive to play.
- Skip a release only if your stream is perfect and the release notes describe something you do not use. Even then, check again at the next release, because fixes accumulate.
- Update Moonlight too, occasionally. A very old client with a new host can cause the same class of mismatch as an old host with a new driver. Keep both reasonably current, and update the host first.
Next Step If the Update Fails Completely
If every step above fails and you are stuck, the cleanest recovery is a fresh install using the full download steps — same trusted source, same .msi installer, same firewall and pairing steps — rather than another update attempt on top of a broken install.
See How to Download Vibepollo for Windows?
Conclusion
Updating Vibepollo is a ten-minute habit, not a project: check the version, get the new package from a trusted source, install it over the old one, and test a stream at 1080p60 before you call it done. Do it regularly, and you avoid the most common cause of “it worked last week” streaming problems — an old host meeting a new Windows or driver update.The one rule to remember is the version-number rule: compare numbers, not file names, and confirm the number changed after you install. Everything else in this guide is just making sure that one rule actually happens.Start from the Vibepollo homepage for the latest package and guides, and check the official project releases when you want to know exactly what changed in a new version.